Painting and Modeling
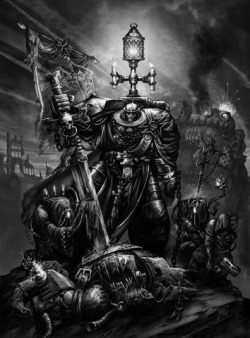
This section of Implausible Nature is primarily the theory side of painting Black Templars. That means this page will discuss how to build and paint your models similar to how I do it. If you are unfamiliar with the steps needed to properly paint a miniature, this page will hopefully ease you into that process. While I don't personally like to paint, I do find the end result rewarding and love the look of a painted army on the battlefield. There are quite a few people out there that place much higher emphasis on the hobby portion of 40k over the actual gaming part of it. As such, teaching a new player these important steps is essential to furthering the hobby as a whole.
However, please keep in mind that I'm by no means a Golden Daemon painter. What I say here is not the only way of doing things. It is just how I do everything, so feel free to cut steps or add them at your leisure. If you don't like something in my painting schemes, change it! Its your army and you should do with it as you wish! Want to see more painted models in the Njesta Crusade? Just click here!
However, please keep in mind that I'm by no means a Golden Daemon painter. What I say here is not the only way of doing things. It is just how I do everything, so feel free to cut steps or add them at your leisure. If you don't like something in my painting schemes, change it! Its your army and you should do with it as you wish! Want to see more painted models in the Njesta Crusade? Just click here!
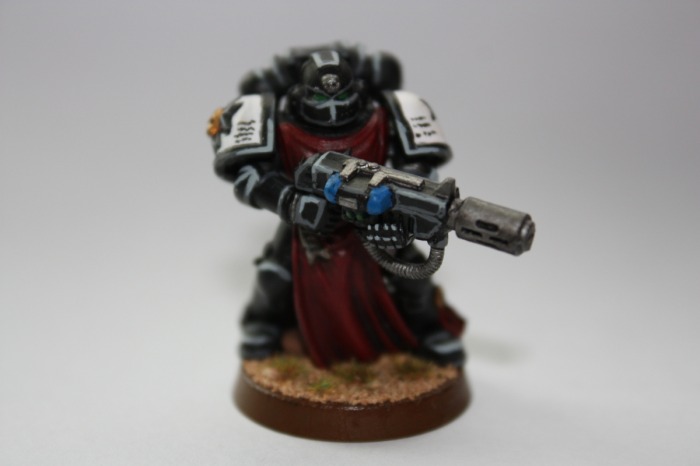

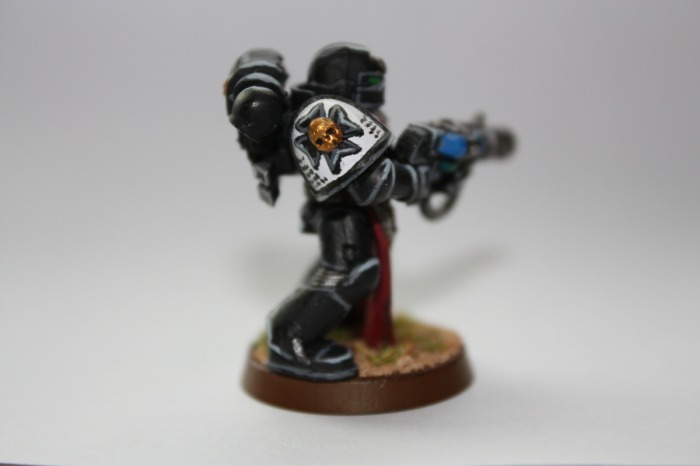
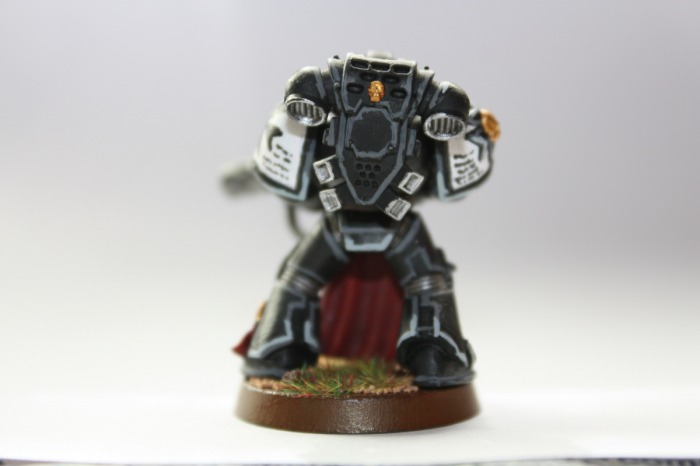
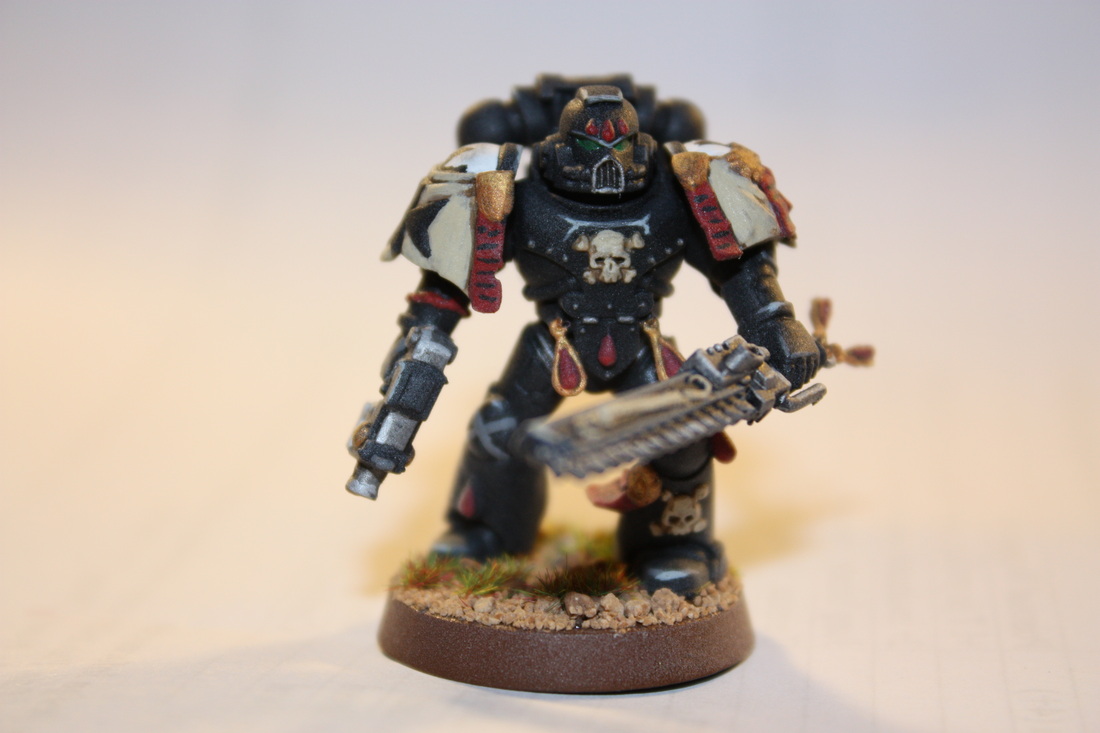

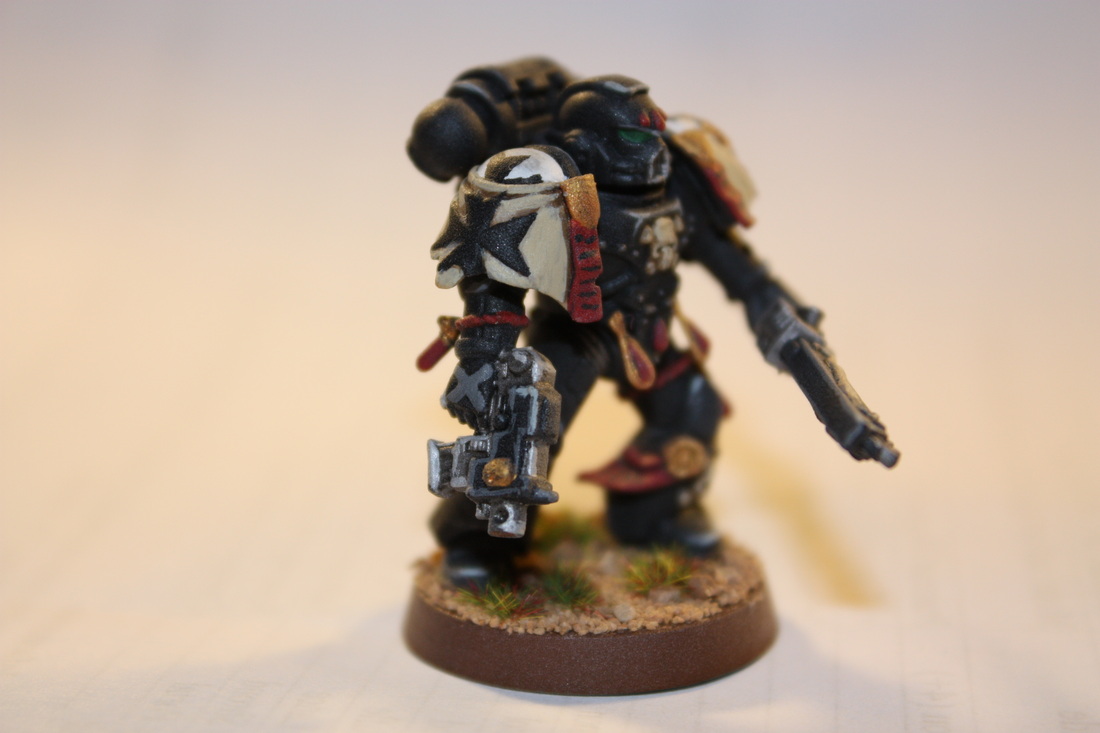

Painting a Njesta Crusade Initiate
Step One: Begin by priming the model black. This can be done with an airbrush or a spray primer. After this basic step is completed, we need to paint over the model's armor with a very thin coat of black paint to make sure the color is consistent throughout. Once that's done, the crusader squad start out like any basic BT model would, with the metallic parts. Gunmetal is used here, and will be later washed with black to provide shading. Make sure you are not painting the gun or sword casing; only put color on the actual metal parts such as the barrel of the gun or the teeth of the chain sword. In addition, you will paint shining gold on any skull motifs located on weaponry (i.e. bolt pistols/chainswords). Also in this stage, you'll be painting gold on any necklaces, crusader seal wax, sword pommels, and tear drop gem jewelry (NOT the jewels themselves!). These will probably take a couple of thin coats to get an even finish. Then start painting the tear drop gems, tabards, the non-shoulder maltese crosses, and crusader seals with a nice thin coat of scab red to start things rolling. Next, paint beached bone on all the remaining skull motifs and non-crusader seal parchment as a first coat. Lastly, we put a coat of Charadon Granite on the shoulder pads, then when that was dry, we will paint a thin layer of skull white over it.
Step Two: Next is the building up of white on the shoulder pads. This will probably take 4-5 additional thin coats, but is necessary to gain an even consistency over the black primer. You will also start washing the beached bone parts of the model with Devlan Mud, then finish them up with a highlight of bleached bone. Once that's done, you'll wash all gold parts of the model with Gryphonne Sephia, then use black ink in the crevices to create contrast in the texture. Next, you'll continue the blending of red areas of the model. For this, we'll be putting thin highlights of Red Gore. Once that's dry, you'll put the final highlight of a red mixture (2:1 mixture of Red Gore:Blood Red) on to finish the blending. Just remember to leave small amounts of the previous Red Gore coat visible. Paint the model's eye lenses whatever color suits your fancy (I chose green). Start with a darker basecoat color, then highlight the very inner portion of the lens with a lighter like color. Last thing in this step is to paint the chest eagle, if there is one. Be very careful when painting the aquila, each feather using a brush stroke each. Use Codex Grey for the base color and highlight it with a 3:1 Fortress Grey:Codex Grey mixture. :)
Step Three: Clean up all your mistakes on the model. Finish up any loose ends needed, including the shoulder pads or tabards. Once that is done, you'll highlight the metallic areas. Metallic areas are given black ink dots in the chain links to add definition (where applicable) and then highlighted with Mithril Silver. Gold areas are highlighted with either Burnished Gold or a 1:1 Shining Gold:Mithril Silver mixture. You'll also do the highlights on the black armor in this last step. Its hard to describe how to paint highlights on black armor, so I'd suggest you watch this video to learn how. Start with a 1:1 Chaos Black:Codex Grey mixture first, then do your Codex Grey extreme highlights. Finally, paint a slight Astronomican Grey edge in the very corners of the highlighted areas. The highlight mixtures are really up to you, but that is my preference. After everything else is done, paint the base with you desired base color. Go outside and spray the model with Purity Seal. This will provide a small amount of protection to the miniature's paint job. However, it isn't a varnish, so you still have to be careful. Purity Seal will dull down the "shine" of the model and give it a dusty look, perfect for my desert themed Templars! Finally, flock and finish basing the model. Congrats, you've just finished your Njesta Crusade Initiate! :D
Marshal Laeroth's Desk

As you can see from the picture, this is my desk where I do all of my painting and modeling. The window gives me excellent natural light during the day, and failing that, I have a strong light source above me. The two lamps also help give me enough light to see the models at night, though this method causes the colors to become slightly yellowish. You will notice that the desk looks a bit cluttered, don't mind that, as there is a method behind my madness. The powers that be decided to give me slight OCD to random things, and my desk is one such place where this comes into play.
So what are you looking at? Well, there are numerous things of note here. One such thing is my cups. Some of them hold my files and paint brushes (orange cup is my roommate's cup of bad brushes), others hold water for cleaning brushes or providing water to thin down paints. Then obviously there is the paints. Besides some incredibly rare circumstances (i.e. GW Washes), I use Vallejo paints and find them to work very well for my needs.
There are all manner of glues (super glue, plastic cement, PVA), putty, green stuff, blue tack, latex gloves, toothpicks (for stirring paints), files, and clippers about. All necessary tools of the trade. There are also flocking material, sand, knives and the like. In addition, you will notice numerous paint brushes scattered about the desk. Besides the ones in the orange cup, which are not mine, I use a varied set of brushes. My main brush of choice is the Floquil brush made by Testors. These are very high quality brushes that run you about $10 a piece. I use these for all my detail work, so brush sizes ranging from 1 to 20/0. Very, VERY nice brushes. I cannot recommend them highly enough. However, since this was originally published, Floquil brushes have since been discontinued. :( For the more rugged, larger, and heavy duty brushes, I've found that the GW Citadel brushes perform perfectly well. Floquil brushes also fit the bill here, but again, you're paying like $10 for a brush that will end up destroyed in no time. GW brushes are much cheaper and are pretty durable.
Finally, the CD's. I use CD's for mixing paints as you can probably tell by the picture. This helps prevent paint waste, as the longer a pot of paint is exposed to the air, the more it dries out. I know, pretty mind boggling. It also provides a nice clean, smooth surface to mix your paints. Oh! And lest I forget, my MP3 player! Sansa 16 gig. Packing lots and lots of Symphonic Metal music. :D